So you just bought a new AR-15 and took it to the range.
You ripped through a few boxes of ammo and now you’re home and you need to know….how do I clean this thing?
Maybe you’ve pulled the pins and separated the upper and the lower and you have no idea what to do from there.
It looks intimidating, right?
Feeling a bit overwhelmed?
No need for that, cleaning the AR-15 is pretty easy!
I’m going to show you just how easy it is to tear your rifle apart, clean it in depth, and put it all back together without fear of damaging anything or leaving any parts out.
Now…with a quick video too!
If that helped, please subscribe to our YouTube channel since we’re adding new videos every week!
Step One: Get the Tools to Clean Your AR-15
If you already have other guns, and you’re cleaning them like you should be (you are cleaning your guns regularly right?) then you most likely already have just about everything you need to clean an AR-15, except for some AR-specific things like a bore brush for your particular caliber.
If you don’t already have cleaning supplies, or if you want to build a complete AR-15 cleaning kit that you can carry to the range or competitions, you have two options: build a kit, or buy one.
Which one is better?
That’s going to be a decision you have to make for yourself.
If you just want a kit that works, or maybe you don’t shoot your AR a lot and aren’t worried about maximizing your cleaning efficiency, then just buying a pre-made kit is perfectly fine.

But, if you are a high volume shooter and you need to clean your rifle frequently, or you’re like me and just enjoy the Zen-like process of cleaning your guns, you’ll probably want to build the perfect kit to meet your needs.
Let’s look at the pros and cons of these two approaches.
Buying a Pre-Made Gun Cleaning Kit
First, if you want to order a kit that will have just about everything you need, there’s no shame in that. Not everyone has the time or energy to build a kit from scratch, and there are several good options out there. The downsides of buying a totally pre-made kit are you can only reliably find universal cleaning kits that are going to include a bunch of extra brushes and bore snakes that you won’t necessarily need.
Think of the pre-made kit like an off-the-rack suit. Sure it’ll work, but its never going to be as nice, or as personalized as a bespoke option.
Basically, off-the-rack is fine, but you wouldn’t want to wear it to your wedding or wear it every day.
The same goes for these pre-made kits…you wouldn’t want to rely on them for something important, say, if you’re a competition shooter, and you’ll want a more personalized option if you’re going to be using it a lot.
That being said, these kits are perfectly fine for most folks, and they’ll be good if you have other guns or other AR-15 calibers, or are looking at acquiring some in the future. Our favorite is the GuardTech.

-
25% off all OAKLEY products - OAKLEY25
Copied! Visit Merchant
With these kits or any kit, you buy/build, you’ll want to make sure that they include the correct size bore snakes and brushes, as well as the other tools that work with your AR-15. Make sure you match the caliber to your gun, or you’re going to have to buy another…and you’ll feel a bit silly in the process.
Check out all our favorites in Best Gun Cleaning Kits.
Building Your Own AR-15 Cleaning Kit
Because cleaning a gun is a process that can vary so much from person to person, it’s best that you build a kit that meets your own needs. You can always pick up several different pre-made kits and combine them into one giant “frankenkit”.
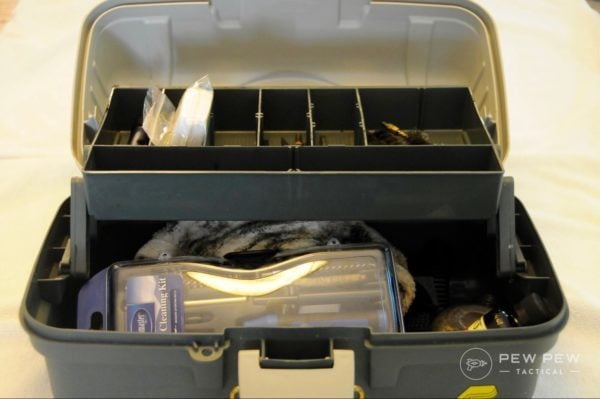
If you’re going to build your own kit, I recommend buying a nice case such as this Plano 3-Tray Tackle Box with Dual Top Access, but anything from a cardboard box on up will do.

-
25% off all OAKLEY products - OAKLEY25
Copied! Visit Merchant
Next, you’ll want a cleaning mat to keep your parts visible and to keep everything organized. A white sheet or tablecloth will do, but I like this Gun Cleaning Mat because it also includes a handy parts list, making it perfect for a beginner.

-
25% off all OAKLEY products - OAKLEY25
Copied! Visit Merchant
From there, you’ll want to buy the brushes and bore snakes/rods for your particular AR caliber. I’ve included some links to .223/5.56 caliber ones below since these are the most common flavors of AR on the market, but you’ll need ones that match your particular caliber.
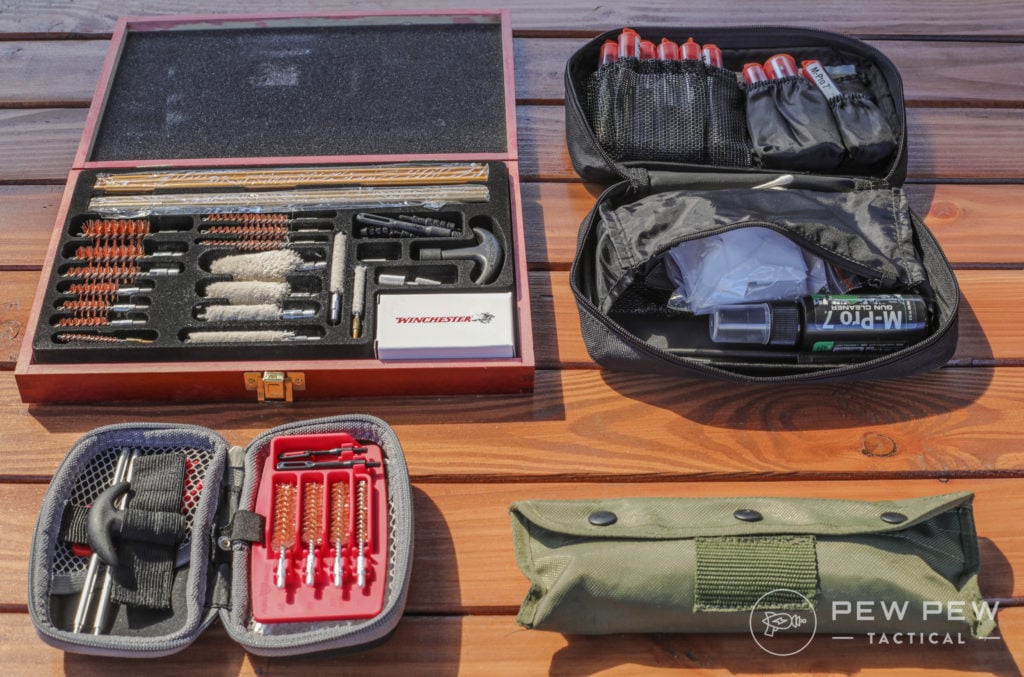
Here are some kits that include more or less everything you need:
- Gunmaster 223/5.56 AR Rifle Cleaning Kit ($12) – This is the one in my case up top.
- Real Avid Gun Boss – AR/.223/5.56 Compact Rod-Type Cleaning System Kit ($30)
- Otis Modern Sporting Rifle & AR Cleaning System ($43)
With these kits, you should have the brushes, bore snakes/rods, punches, and other various and sundry things you will need, other than your consumable cleaning supplies such as solvent, lubes, and cleaning patches.
The only other things you may find useful (especially if you want to get into some light gunsmithing) is a better punch set like this Ultimate Arms Roll Pin Punch Set ($29.99) and an AR-15 Vise Block ($49.99) that fits into the mag well of the rifle so you can secure it in a bench vise without scratching the finish on your gun.
Best AR-15 Cleaning Solvents and Lubricant
- Hoppe’s No. 9 Gun Bore Cleaner
- Hoppe’s No. 9 Lubricating Oil
- CLP Oil, Solvent, and Lube Combination
- Ballistol Multi-Purpose Aerosol Can Lubricant Cleaner Protectant (We love this one so much, we wrote a Ballistol Review)
Step 2: Prep the Area and Clear the Firearm
First, lay out your cleaning mat and throw on some gloves. Some of these chemicals are toxic and you want them in the gun, not on your skin or in your body.
Next, round up all the ammo for your gun, and move it off the table. Seriously. Get it out of the room, if possible. This eliminates the possibility of a round finding its way into the chamber at any point.
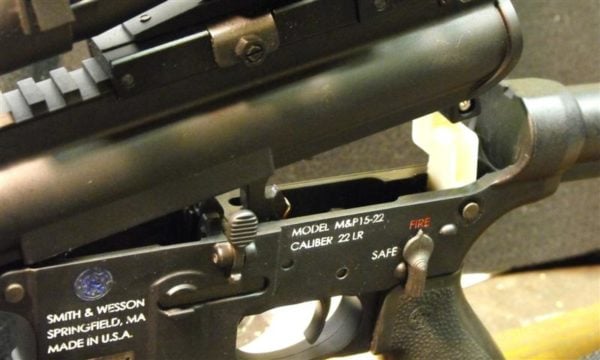
Next, clear and render safe your firearm. (That’s fancy talk for making sure the gun can’t go pew, pew pew, or pew pew pew for any reason.)
Here’s the full procedure
- Point the rifle in a SAFE direction.
- Remove the magazine.
- Place the weapon on safe (don’t worry if you can’t because the hammer isn’t pulled back).
- Lock the bolt to the rear.
- Visually inspect the chamber and remove any ammunition that may not have been ejected.
- Release the bolt.
- Place the weapon on safe.
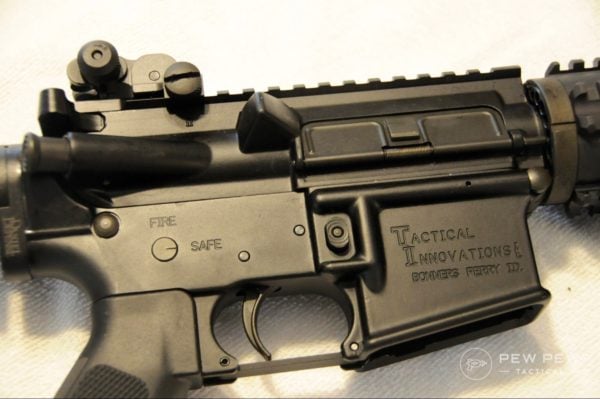
Step 2: Separate the Upper Receiver from the Lower Receiver.
Push the take-down pins out and pull the two halves apart. Some pins can be pushed out with your finger, others may require the use of a punch. Be careful whatever you use so you don’t scratch your finish. I recommend a nylon punch from one of the kits above for general use.
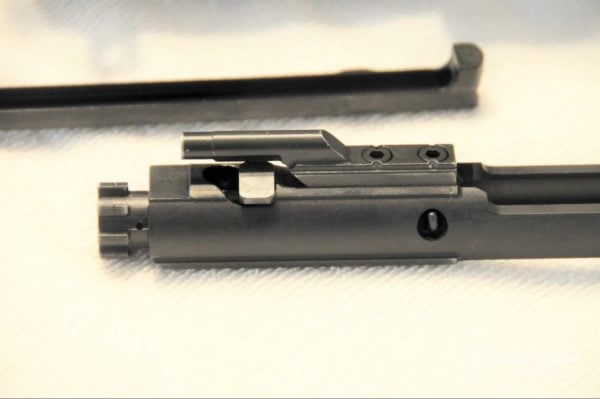
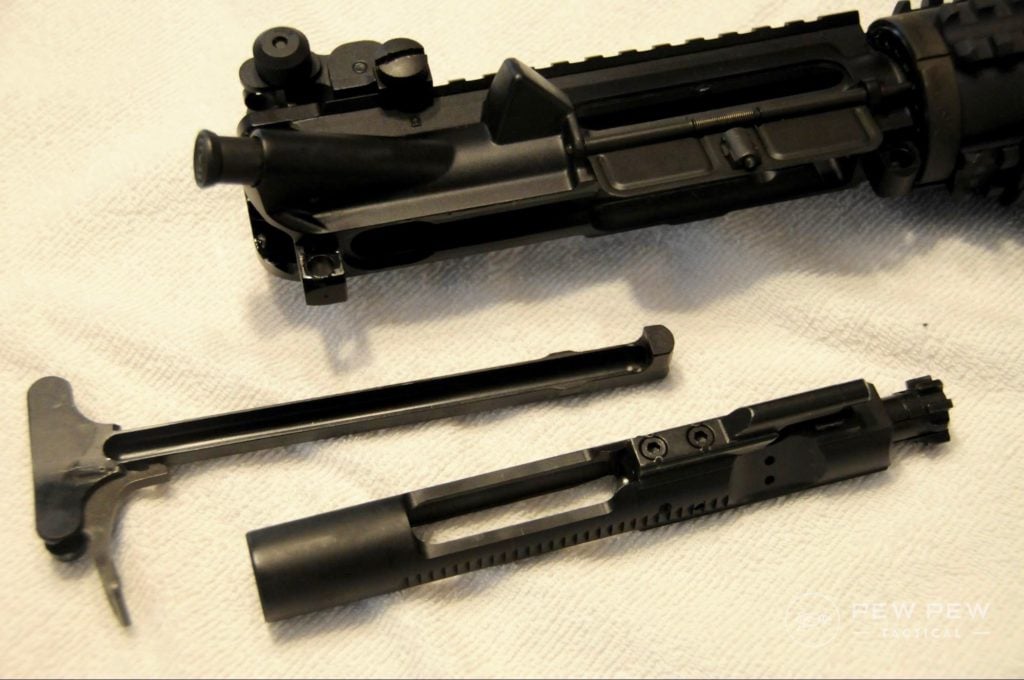
Step 3: Remove the Charging Handle and Bolt Carrier Group
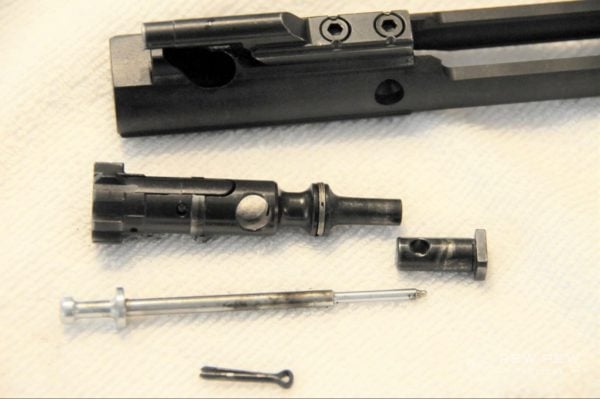
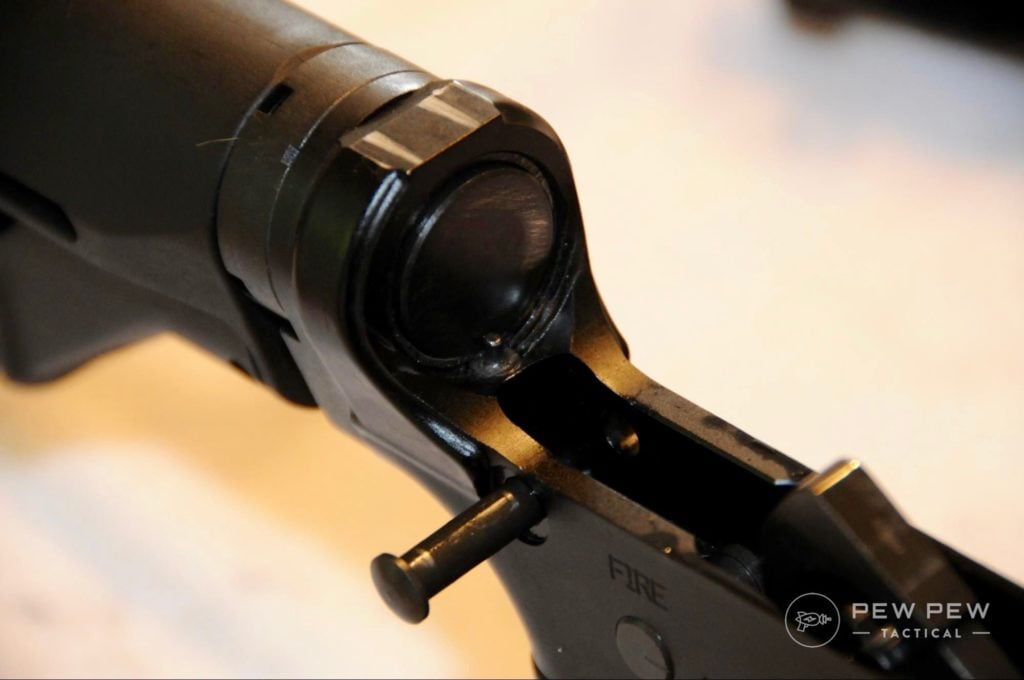
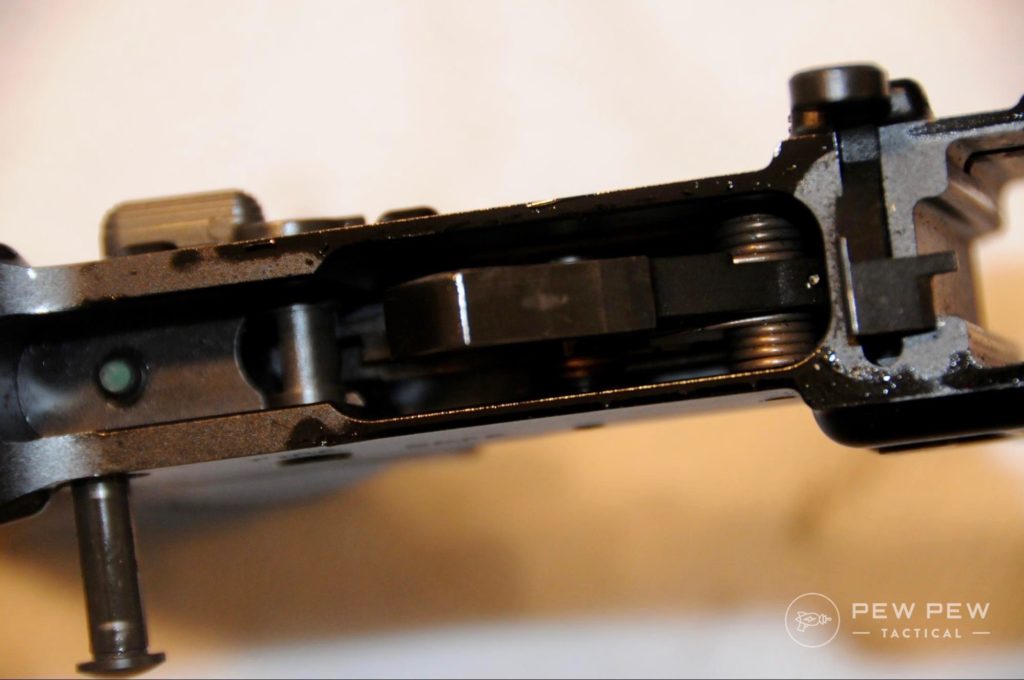
Step 4: Disassemble the Bolt Carrier Group
First, push the bolt to the rear (pictured above) and remove the firing pin retaining pin using your pick. Remove the firing pin and set it aside. Rotate the cam pin ninety degrees and remove it. Now the bolt should slide right out!
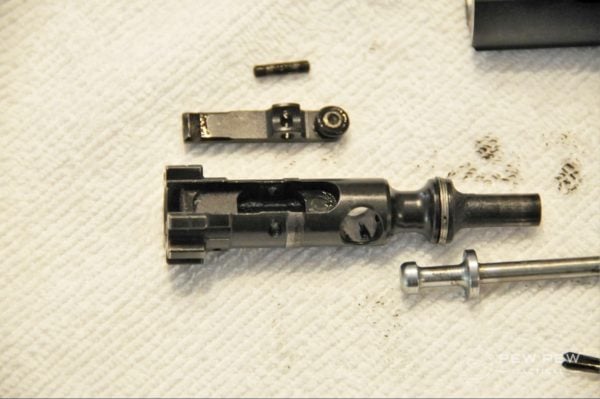
Step 5: Disassemble the Bolt
Once you have the bolt out of the bolt carrier group, use a punch and your mallet to remove the extractor pin, and then remove the extractor and set it aside.
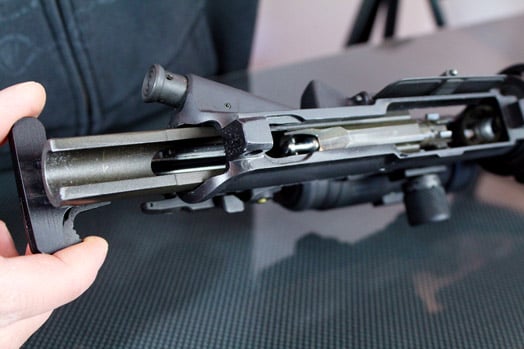
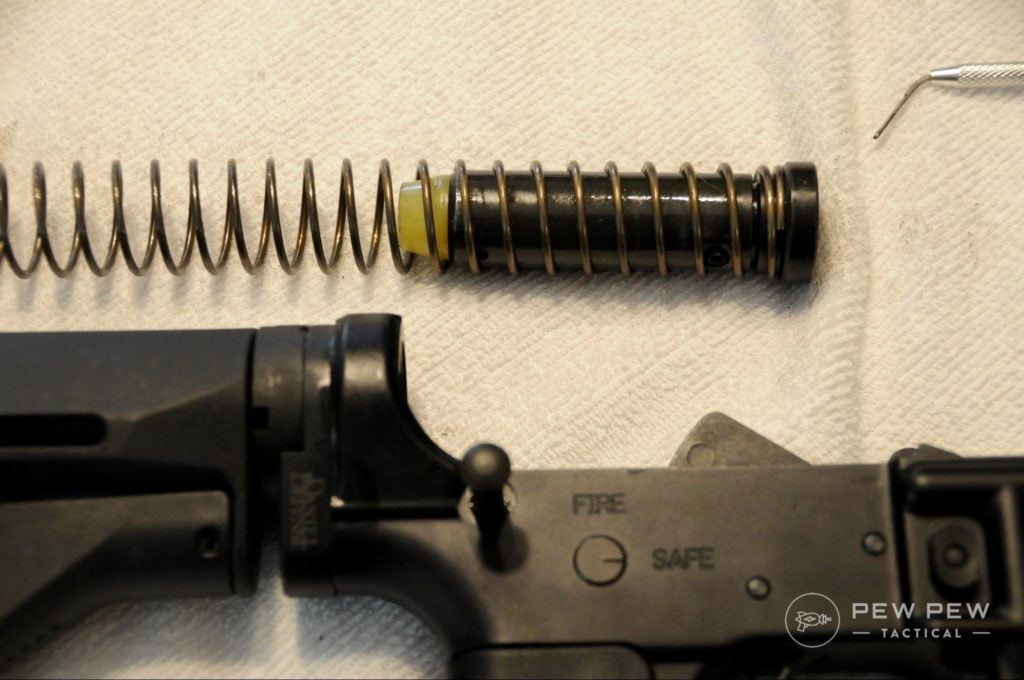
Step 6: Remove the Buffer and Buffer Spring from the Buffer Tube
Using a calloused finger, or a punch, press down on the buffer retainer. Remove the buffer and spring from the tube. Remember the retainer is under pressure, so try not to push down on it too far and slip once the pieces are out.
Otherwise, you’ll spend the next few hours looking for it after it springs off to the other end of the room.
Step 7: Clean the Chamber and Barrel
Everyone has their method for this, but there are a few things you need to remember.
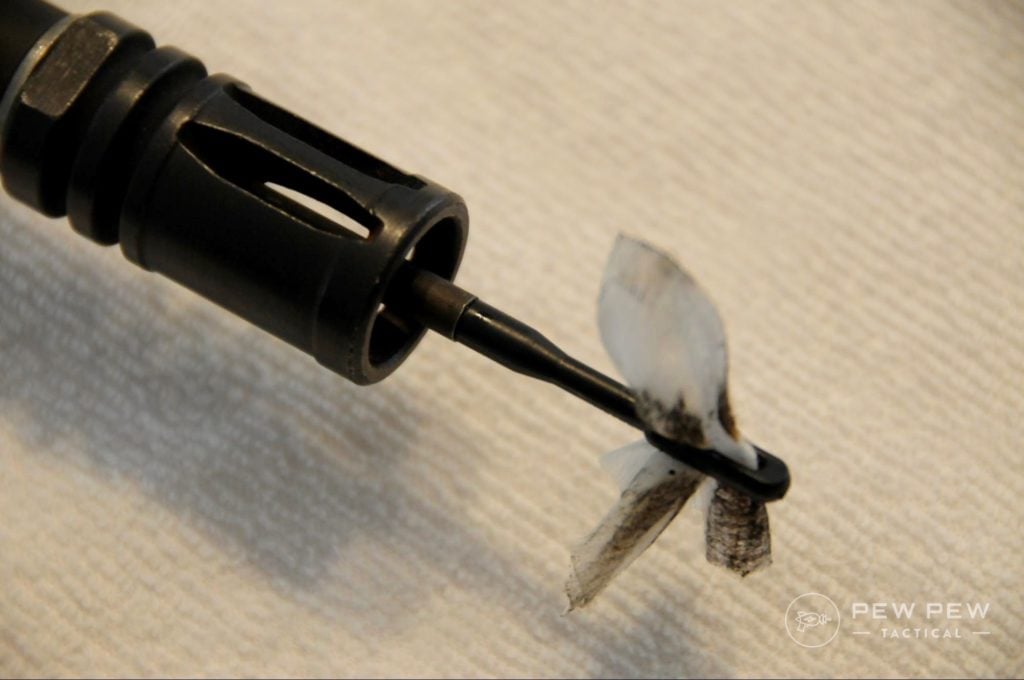
The most important thing is that you clean the chamber and barrel from rear to front. You want to make sure the debris comes out the front of the barrel, and that any brush you use on a rod is inserted from the rear – go with the bullet.
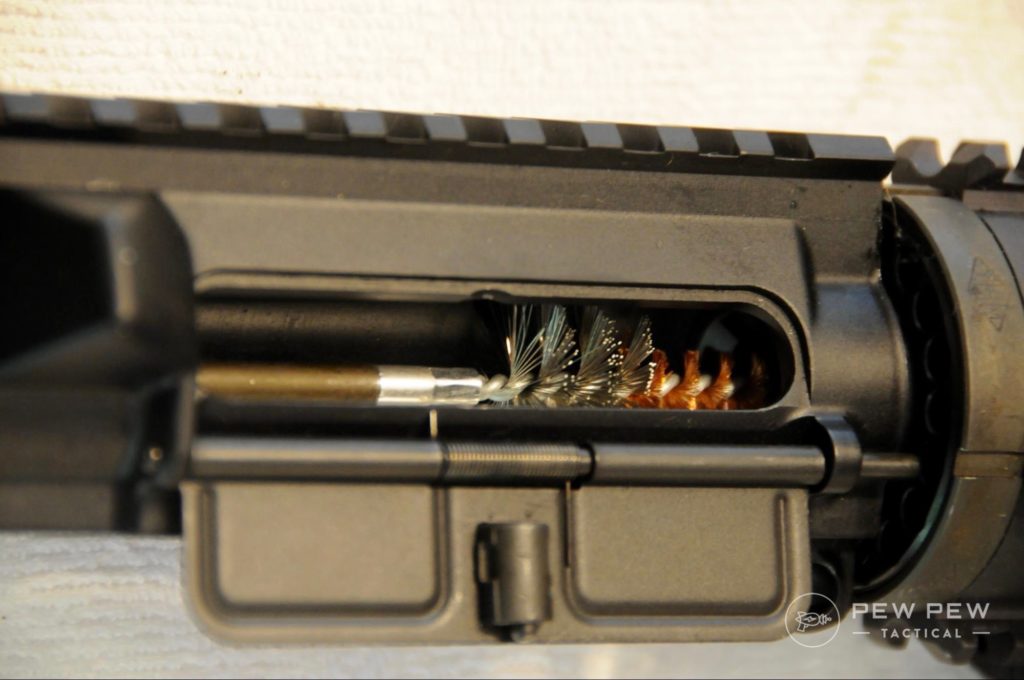
This helps keep the rifling intact. The movies are wrong; you don’t clean from the muzzle to the chamber!
This area takes some creativity to clean up, but with time you’ll find what works for you. This is a good place to drop a little bit of that Bore Cleaner you picked up.
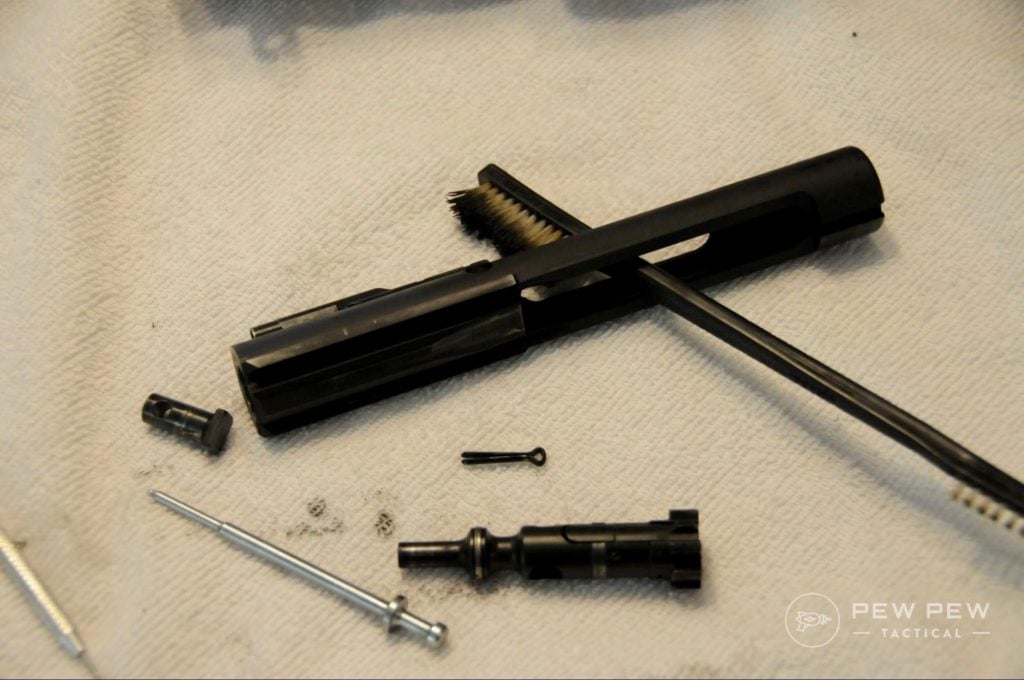
Step 8: Clean the Bolt Carrier Group
This is easier than the chamber and barrel.
Give everything a good scrub. Look for carbon buildup, especially at the rear of the firing pin.
Clean the extractor well, attention to detail is key. I make sure my rags are all plain white and cleaned after every use with bleach.
Set one aside as an “inspection” rag so you can easily find missed carbon.
When you’re finished, reassemble the bolt carrier group in the exact opposite order of disassembly. Make sure your bolt is fully to the front so it can be reinserted in the upper. A flick of the wrist helps this along.
Step 9: Clean the Buffer Assembly
This part is easy. Get a rag with a little lube on it and wipe it all down.
Unless you took your rifle to a really cool obstacle course, you probably won’t need to get back in the tube itself. Wipe down the spring and buffer and you’re all set.
During this step, if you have a collapsible stock it’s not a bad idea to remove it and wipe down the outside of the buffer. It’s an option if you have been in a messy environment, but not needed for range trips.
Step 10: Clean the Charging Handle and Upper Receiver
Just like the buffer assembly, a lightly oiled rag is all you should really need here.
You’ll find what works best for you, but once reassembled the charging handle should move effortlessly within the upper receiver.
Step 11: Clean the Fire Control Group (FCG) and Lower Receiver
This takes a brush, oil, and patience.
It generally doesn’t get too fouled up. Pay attention to your FCG and make sure there are no cracks on the hammer or anywhere on the lower receiver.
Step 12: Reassemble your Rifle
Work backward from the takedown, just like the bolt carrier group. After the fifth time, you do this it will become second nature! It should look something like this when you’re done.

Step 13: Lubricate your Rifle
There are more details to this, but I’m going to keep it simple for right now. All the pieces of your bolt carrier group and your charging handle should receive a light coat of lubricant. It should have a nice sheen to it.
Your FCG, mag release button, bolt catch button, safety selector should all get a drop or two of lubricant. Fiddle with them a touch to work it in there. Bottom line, anything that moves needs to have a bit of lubricant on it.

Step 14: Perform a Function Check
You put all your ammo away at the beginning of this whole deal (right?) so there should be no way a round is anywhere near the chamber but do a safety check just in case.
Then:
- Point the weapon in a safe direction.
- Pull the bolt to the rear and release it forward.
- Place the rifle on safe. Squeeze the trigger. If the hammer doesn’t drop, you passed that step.
- Place the rifle on fire and pull the trigger. The hammer should fall. If it does, then you’re all finished with the hard part.

Step 16: Clean Your Magazine
This is an often overlooked step. It doesn’t need to be cleaned after every trip to the range. Just pay attention to it during loading.
Does it bind up? Can you hear dirt rattling around in there? Is it hard to load?
Cleaning the magazine is just like cleaning the buffer assembly. Use a pick or whatever you have handy to remove the base plate.
Remove the spring and follower. Wipe it all down and clean it up. Reassemble in the reverse of disassembly.
These are pretty straightforward. If you’ve invested in anti-tilt followers for your GI magazines, this is a great time to install them.
Step 17: Maintenance
Just like the break-in procedure, every rifle has its own maintenance schedule. Consult the manufacturer for more. A general rule of thumb is to give your rifle a thorough inspection every thousand rounds. Once you hit the five thousand round mark, it is a good idea to move to inspections every five hundred rounds.
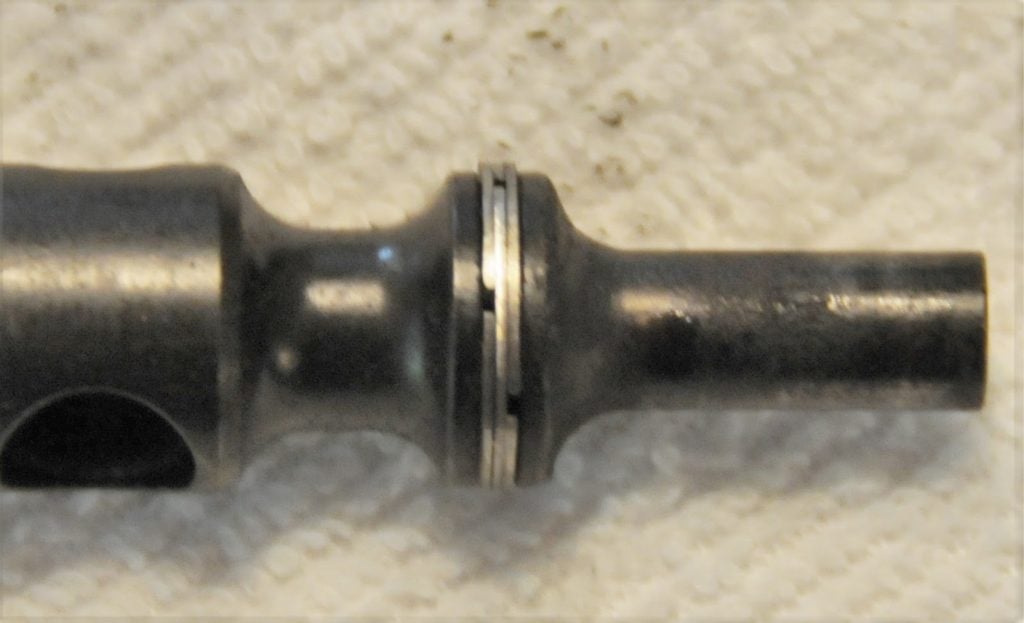
The most common failures occur in the various springs (specifically the extractor spring), and in the O-Rings on the bolt carrier group. If failures begin, start there!
Keeping a clean and properly lubricated rifle will naturally reduce the risk of failure and extend the life of your rifle. During each cleaning, inspect all parts of cracks, burrs and general wear and tear that may bring your rifle out of spec.
Some Final Thing to Consider When Cleaning an AR-15
Do you shoot corrosive ammo? Check out our handy guide for more information and proper cleaning instructions.
Take your time. You want to be as thorough as possible. Really get inside the bolt carrier with every rag and cleaner you possibly can.
When inserting the firing pin retaining pin, remember the big hole is where it goes in. If you put it in the small hole on the other side, you’re going to have a bad day.
Anything that moves on your rifle should get at least one drop of lubricant whenever you clean. Just like an engine, that oil is important! I cannot stress this enough.
That about does it for this one folks, if you have any questions or want to tell us about your own cleaning procedures, drop us a line in the comments below! Want to see what can happen when you DON’T clean your AR…check out 8 Most Common AR-15 Failures.


26 Leave a Reply
Good presentation, not too intimidating to those just starting out with a new rifle. A very important "prequel" to this would be spending five minutes on proper break-in for a new rifle. In my opinion that's more important than cleaning it the right way, as poor break-in will permanently compromise bore performance while poor cleaning habits can often be fixed.
Roger that on the Bore-snake! However, I've always been taught to pull the snake from muzzle to breech since the other way drags dirt and everything else from the nasty receiver through the rest of the barrel. Is there a good reason not to clean from the muzzle as long as the snake is kept straight and aligned with the bore axis (i.e., muzzle pointing straight down)?
Thanks.
Bolts don't have o rings, and they don't fray. They have gas rings made of steel. They pretty much last as long as your bolt will. Your extractor may have a crane mod o ring mod to assist the extractor spring, but that is something completely different.
Yea I kinda chuckled at that one as well. however while the "o=rings lolol" do last a long time it really does depend on the amount of rounds. I have had a need to replace them before but I put quite a few rounds through it first.
Anybody ever had an issue with the ejector "button" and / or spring getting fouled? Recently I have been getting occasional light primer strike and I suspect maybe its the ejector. It's pretty hard to depress on my 308.
Johnny’s video is really, really good, but he failed to start by telling the viewer to make your weapon safe and be sure that there is no ammunition anywhere near the weapon while you are cleaning it. The written content in this otherwise very good article does emphasize this really, really important safety measure.
This was very helpful.i recently bought my first ar-15.the ruger 556.its a bit overwhelming taking it apart to clean etc.i think this article will help me,make it easier to understand.
I started shooting the NRA National Match High Power Rifle Course of Fire about 50 plus years ago and changed to "Run and Gun Shooting" in the late 1980's.
I don't profess to know it all but, I clean all of my firearms at about 200 rds and never had a failure. My cleaning process also includes an inspection of all parts and replace as needed.
I also use "Kroil" to clean all the parts and barrel of my firearms. "Kroil" in a penetrating oil that does an excellent job removing all the crud.
I experimented with "Moly Coating" my rifle bullets one year and cleaned the action and bolt carrier group at 200 rds and cleaned the barrel at about 800 rds and found no major decrease in accuracy but had to replace the barrel midway through the next season.
I changed to "High Tek" coated handgun bullets about 10 years ago and found that my hand guns cleaned up very eazy with no decrease in accuracy.
Finally, a barrel typically has 2 to 6 seconds of barrel life, measured in time the bullet is in the barrel. So a typical barrel is shot out in 1,200 to 1,500 rds. Some last longer but in any event is gone completely by 2,000 rds.
For those of you that folly with the idea that you can shoot an AR for extended periods (200+) without cleaning, your just wearing out your barrel and rifle quicker.
Additionally, never over oil your rifle and especially an AR-15/10 just wipe on a small amount of top quality oil in a few critical wear spots works, refer to your owners manual.
STOP using grease on your firearms, grease is just a dirt magnet.
I am a newb to the realm of AR ownership and found this article in a web search. Doing a breakdown inspection and cleaning on my first AR. Found ammo today - now just need the sights to come in and I'm off to the range. Feel like a kid at Christmas who got a new toy that came without batteries, and all the stores are closed!
Thanks for the tips on the breakdown and cleaning!! I noticed the action is MUCH smoother now that the manufacturer's grease is off the BCG.
do you recommend lubricating the barrel as well?
Haha. No.
Very good video! I use Lucas gun oil, love the stuff! I take the upper off, BCG out and use Hopes cleaner (because it was I have currently). I use blue shop towels (Because I also use them in the garage and really like them). I do not disassemble the BCG, no special cleaning system other than look at everything, wipe it off, clean the bore, look for black stuff and bam, bam I am ready to go.
I soak the BCG in Brownells carbon remover. I put the same on the bolt and barrel locking lugs and have a bore snake dedicated for use with carbon remover in the bore. After I wipe off all the carbon cleaner from all the disassembled parts, I use a quality cleaner like shooter’s choice to remove any carbon from inside the barrel, the lower or BC Key. Everything is left to dry completely. I than use a quality oil (like Remington aerosol oil) to put a light coat on all moving parts. All of my BCG’s have a melonite coating so carbon comes off rather quickly. A final wipe of the barrel and lugs to check for excess Oil and any residual carbon with a dedicate bore snake for oiling, finishes the job. The next day I function the parts and apply, if necessary, any additional oil. The AR can not be run dry, so oil accompanies wherever I go. This doesn’t mention the break in period with JB Bore Cleaner on all new bores which is a separate procedure. I was trained by the FBI as a Police Counter Sniper, and their protocols have stuck with me.
Thank you, Johnny. I had never cleaned an AR before. While watching your video, I had no problems disassembling, cleaning and reassembling my AR. I appreciated your humor too.
Thanks again!
Thanks Cameron, from a 19K to a 19D, great tips on cleaning. You are helping so many folks with their rifle maintenance. Scouts out!
You ask what a person uses for cleaning, I use large shotgun cleaning patches to wipe down and clean my weapons.
Hi
I cleaned and reasembled my colt M4 and the trigger seems harder than usual, and also its kinda gritty.
Is it just psychological because I hate pulling the trigger on an empty chamber or is it possible to "damage" the trigger by cleaning it ?
What I did :
I cleaned it with ballistol, sprayed everywhere, and Qtips but I don't see any residue anywhere.
Opened it again, soaked in ballistol and played with the hammer and pulling the trigger but it doesnt change anything.
Thank you :)
I am a complete noob. That being said, I have read and watched multiple videos on cleaning the AR. I learned NOT to add any oil, cleaner, CLP etc to the inner trigger assembly. 1. It doesn’t usually need it because it doesn’t get too dirty.2. If anything the oil can actually attract more particles than had you not added anything at all. Best to use one of those compressed air cans. He did say to lightly oil the top part of the hammer because that’s where the friction hits. That’s it. I also learned not to use too much oil either. An average amount spreads out a smooth layer. Not soaked.
Again, total noob, but also a total nerd that’s done quite a bit of research. Do double check what I said, ask someone experienced, but I just want to help since I learned that.
I love the use of memes, this is the only site I get gun tips from!
Glad to help!
Great article. Would like to have a copy, but cannot print. How can I get a copy?
About a year ago, I purchased a DMPS AR 223/5.56 rifle. I was shocked and dismayed to discover that the magpul front and rear sights do not line up with each other because the front rail is lower than the rear rail. I spoke with DPMS to see how this infraction could be corrected but they were no help. I purchased a scope, but it made the rifle heavier. I have searched high and low for .338 rail/front to increase the height so it would match the rear rail but have been unsuccessful. If you have any suggestions that could correct this issue, I would be eternally grateful. Rebuilding the rifle is not an option for me due to lack of funds.
you may need to get a low plane front sight. it sounds like your front sight is on the gas block right?
it may be the front sight you currently have is meant to be on the hand guard, not the gas block, you could also try moving it if it's the kind that mounts on a picatinny rail.
there are also front sights that are specifically meant to be on the gas block.
i'm way late but in case you haven't figured it out yet, there is my two cents.
Good information presented well. Thank you sir.
Great job,not really new to the AR but had a 60 most of my enlistment...and just loved it Who didn't. your guide brings me back in focus from many many years ago .Hope I can wiz through it in a few cleanings of taking my time and following your detailed instructions...Thanks for your time served and your future .
Great guide. Very detailed! I'll definitely be sending new shooters here when they ask me how to clean their AR. Personally, I clean mine in a slightly different order. After I remove the BCG, I spray the barrel. inside the upper, and charging handle with cleaner and set aside. Then I take apart the BCG, spray all the parts, and set aside. After that, I go back to the upper, barrel, and charging handle and clean them with brushes, snakes, patches, rags, etc. After I am satisfied with the everything else, I move on to cleaning the BCG. In my experience, it seems that letting the cleaner "soak" into the components(even for just a few minutes), it really helps getting rid of the carbon build up. (I do the same thing with handguns.)
There are only two other differences in my cleaning routine, but they are mostly just personal preference. I generally don't pull the buffer every time I clean, maybe once per 1k-1.5k rounds. And I only pull the extractor to clean every 500 rounds or so (barring any issues), I do shoot some lube in it every time I clean the BCG and wipe it off. I've went through 1k+ without pulling the extractor without any major carbon build up. The majority of what I shoot is non-corrosive steel-cased surplus ammo.
Cameron, thanks for your service! HOOAH!